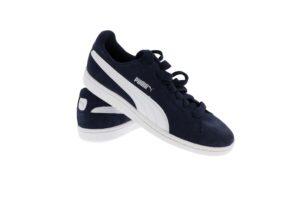
If you own an eCommerce business, then you know that great product photography is a key piece of your success. It’s important to have clear, high-quality images of your products that show off their features and appeal to buyers. eCommerce marketing is expensive enough without hiring a professional photographer. So how do you take great product photos for eCommerce listings on a budget? In this blog post, we’ll give you some tips for DIY product photography.
What product photography equipment do you need?
First of all, you’ll need to choose the right camera for your DIY product photography. You don’t necessarily need a fancy DSLR or professional-grade equipment—any good quality digital camera with manual settings should be enough. If you need close up shots for smaller items or detailed physical attributes, make sure that the shutter speed is high and that it offers macro mode.
 Can you use your iPhone?
In most cases, absolutely. The latest models take quality photos that will make most products shine. But whatever camera you choose, you need a tripod. You’ll also need a background—plain white is a good idea. Use a piece of white poster board that fills the frame. Depending on the size of the products, you may not need a large background.
Product photography setup
Next, you’ll want a simple but effective DIY product photography setup. Shoot in a room with at least one window for natural light, and you can use reflector boards to manipulate the light. Experiment and find a set up that features your product in the best possible light.
Use multiple photos and different angles
Think about when you buy a product from a brick-and-mortar store. You might pick it up and look at multiple angles. You might see how it looks from far away or from close up.
Your DIY product photos should provide a similar experience in your eCommerce store. Show the item from multiple angles and distances. Try to include shots that feature any interesting details or features.
Show your product in action

Consider including lifestyle shots of your product. This can be a great way to show off how it looks and performs in real life settings. Use props that are relevant and interesting, so your DIY product photography stands out. If your product is a piece of a larger experience such as hiking or camping, show the larger context. If it’s a tent, take photos of what it looks like, how it works, and most importantly, the experience it delivers.
Finally, use a shot of a person using the product as intended. You’re on a budget, so it doesn’t need to be a model, and it doesn’t even need to show a person’s face. If it’s something they hold, you might only need a pair of hands to show it in action. If it’s a paintbrush, show a closeup of a brush stroke. Give the customer a clear a picture of what it does.
Bonus: Use videos of your product to make your listing standout.
Capture the size of the product
Depending on the products you sell, your customers might want a particular size. Your listing can include dimensions for larger items. This is helpful if customers wonder how a piece of furniture will fit. But for something the customer wears or plans to display, they might need more context.
Show the product in relation to a person’s body or next to something else like coins, toys, books, etc. Remember, customer satisfaction depends less on whether the product matches the listing, and more on whether the product matches their idea of what they’re buying.
Create a visual brand
You don’t need to be a creative expert to provide a consistent experience for customers browsing your products. Use the same size for all your images. If you sell related products or different SKUs of the same products, use the same angles or scenes for all of them. When you find product photos that perform well, reproduce the visuals wherever you can.
DIY product photography can help you save money, while still giving customers the best possible experience. With some basic equipment and a few tips, you can create stunning images that attract attention and get sales for your eCommerce store. And with a bit of practice, you’ll be taking professional-looking DIY product photos in no time.


